Showing posts with label Hero arts. Show all posts

Monday, January 8, 2024

Elegant Valentines with Hero Arts Digital Designs

 Hello Crafty Friends,

I had a bit of a lightbulb moment recently:  My children are no longer little kids.  My son (20) and daughter (17) still (claim to!) love to get cards from me--but cutesie critters from my stash are no longer great choices for either of them.  Time to change up my card-making for the kids. 

Fortunately,  the Swirl Valentine Digital Kit from Hero Arts is just what I need to create elegant cards for both of them.  

Here's the card for my son:

How to:  Using the burgundy background in the kit, the swirly big heart, and the Love You sentiment, I quickly built a card for my son--I printed the background on our family color printer and then over printed the heart and sentiment over the background using my laser jet printer.  I added silver toner foil to the design, ran it through my Minc foiling machine matted it with silver cardstock, and put it on an A2 card base.  Too. Easy!

Here's my daughter's card:

How to:  I created a background using the Leaf and Floral Stencil and pink inks.  I printed the same image and sentiment I used for my son's card--but this time I printed it onto vellum paper using my laser jet.  I added hot pink toner foil to the vellum, and ran it through my Minc.  I also blended pink inks onto the back of the heart image to help it stand out.  I placed the vellum design on the background and that was it!

Two elegant cards for my nearly adult kids (wow, time flies), ready in plenty of time for Valentine's Day. 

My post is part of the February Hero Arts blog hop -- and if you leave comments here and on other stops along the hop, you could win $50 gift card, drawn from the comments left across the hop. Enter by Sunday, January 14th at 11:59pm PT, and the winner will be announced on the Hero Arts blog the following week.

Here's the entire hop list:

Thanks for stopping by!

Essie

Monday, January 9, 2023

Cappucino Dreaming with Hero Arts

Hello friends!  I'm excited to help Hero Arts introduce its January 2023 release, which is all about love --and it includes some great new digital products!  I love digital designs: They're versatile, inexpensive, easy to work with, and take up ZERO storage space in my overstuffed craft room.  


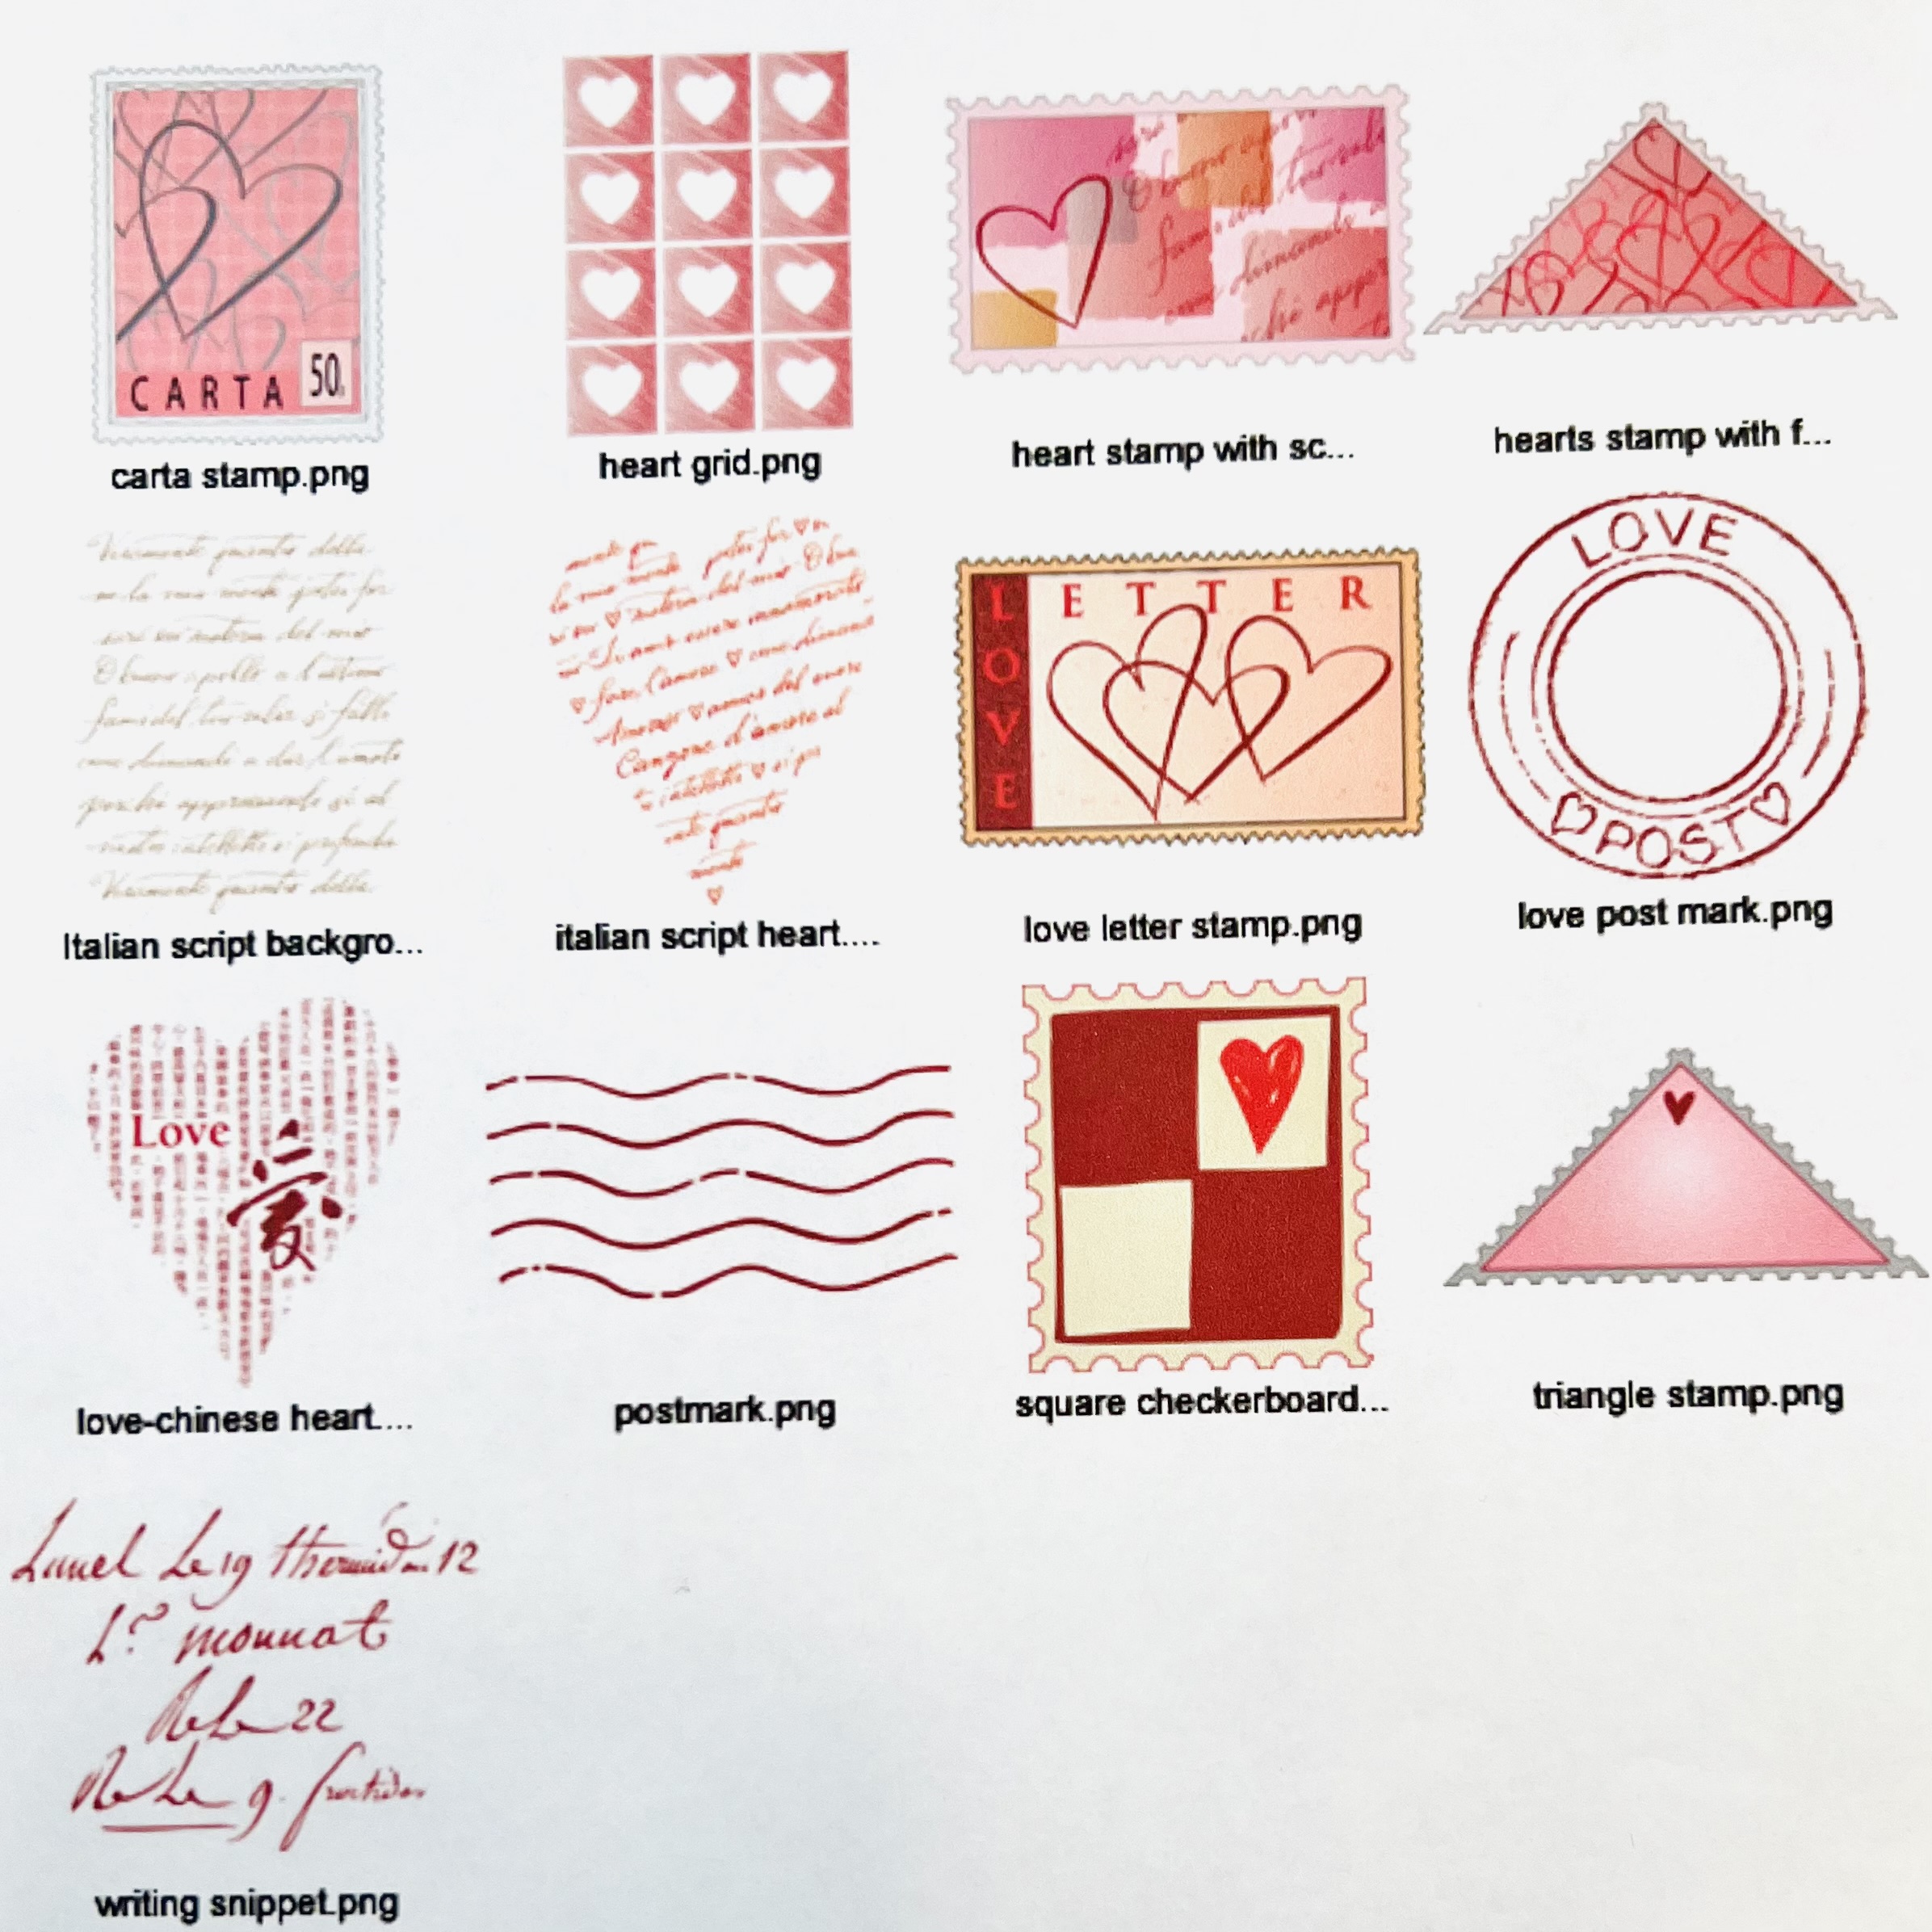
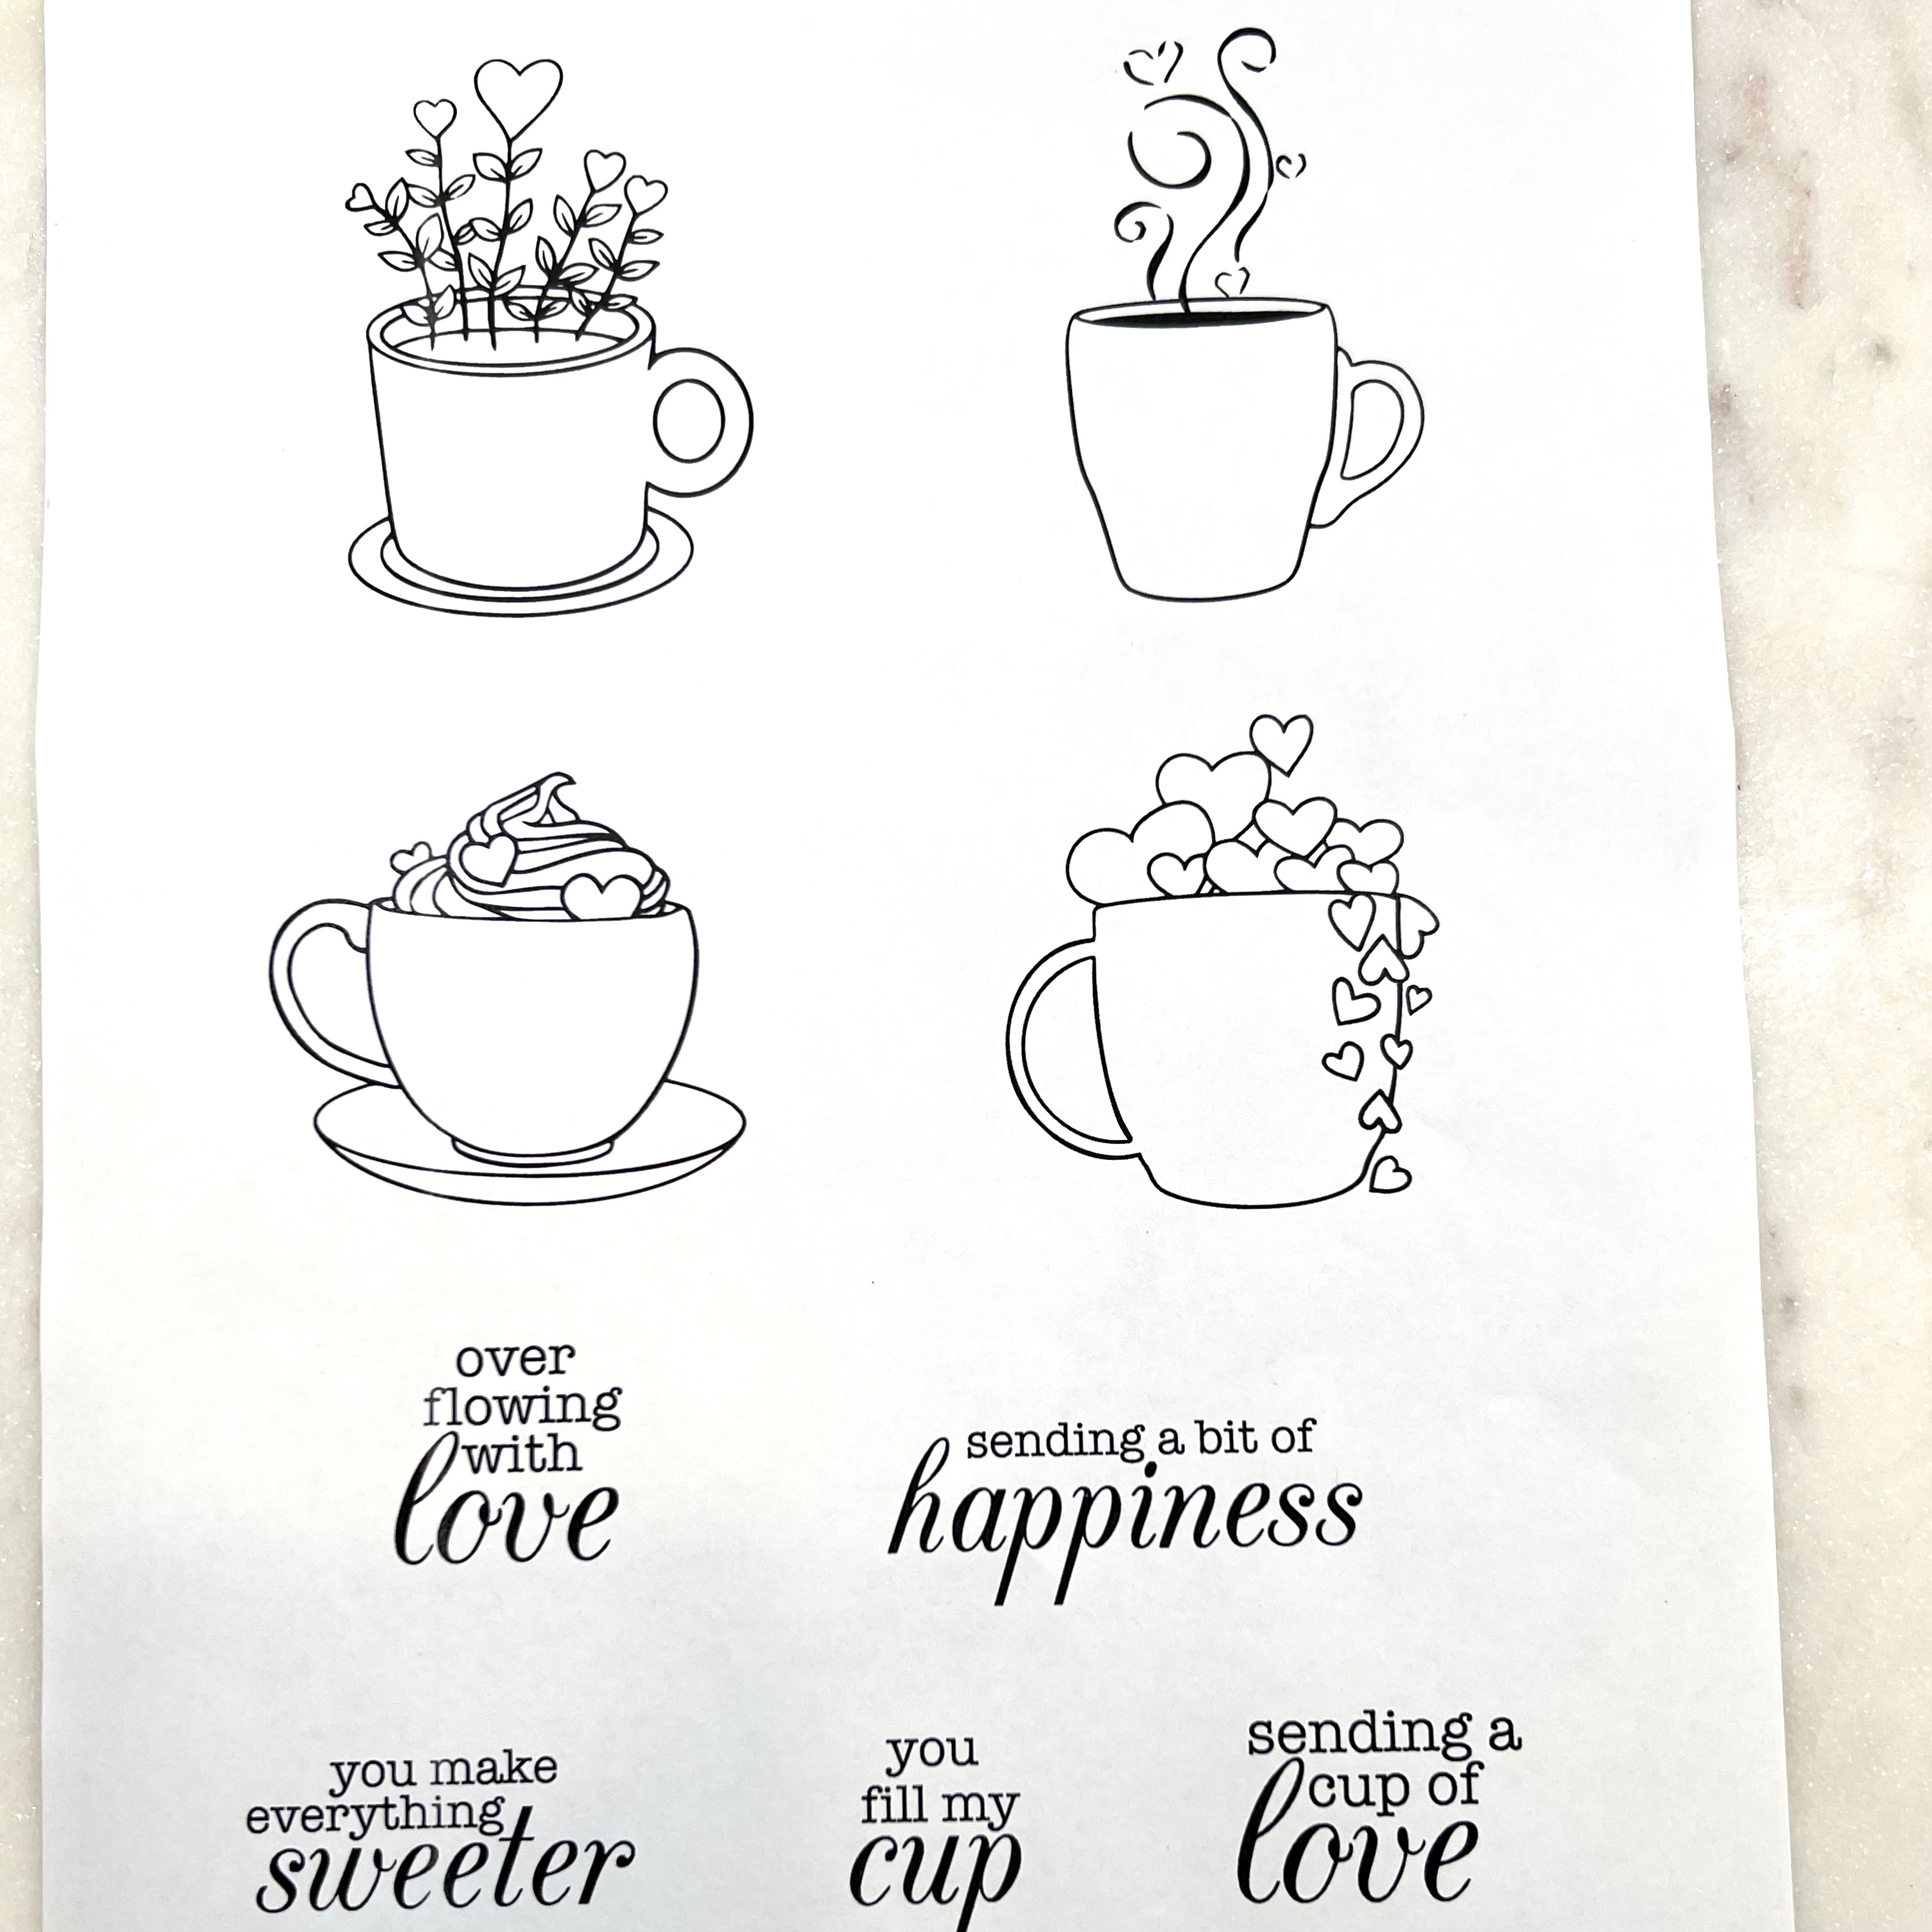
 My card uses images from both the Love Letter digital kit and the Valentine Mugs Printable. 

These are the contact sheets for each set -- each image is a stand alone and can be resized, colored, flipped and altered to suit your needs.  I'm NOT a digital wizard and use no special software to make these cards--in fact, I use free Google software that I access with my gmail address. 


How I made my card:  I printed the Italian script heart in black onto lightweight card stock using my laser jet printer and cut the page down to 4.75X6.75 inches and ran it through my Minc machine with gold toner foil.   You can skip the foil if you don't have a Minc or a laminator, but if you do. . . . Foil All The Things!

Next I inserted the "you fill my cup" sentiment into the whipped cream topped mug, and printed and foiled it and, after coloring it with my Copics, fussy cut it and put some foam pieces on the back to add dimension to my project.

I made a copy paper reverse mask to fit the large heart image and used Cotton Candy core ink to ink blend that big Italian heart.  Going a little too heavy-handed with my blending in one spot helped create dimension since I had to make some other deeper-colored sections of the heart. I love these happy accidents! 

I positioned the popped up mug at the bottom of that big heart, and plopped the whole panel onto a light gray (Hero Arts Granite) 5X7 (A7) card base.  And that's the card.  I'm calling it "Cappuccino Dreaming."


I'll be back later this month with some more Hero Arts cards using their new digital images. 

Until then, Happy Creating--I can't wait to see what you make!

Essie


Friday, June 11, 2021

Monochrome Madness, Part 1

 Hi Crafty Friends,

I'm in a monochromatic state of mind and wanted to share a few of my most recent monochromatic creations with you--all in summery shades of blue-green--from light pool to deep teal, but each in a very different style:  


I made all of these for our June monochrome challenge over at A Blog Named Hero--and my center (shaker) card is also for this week's Beyond the Blue Challenges.   And all the stamps and dies above are from Hero Arts!  I am getting pretty attached to this idea of a simple singular color palette--it gives my brain a chance to focus on other aspects of a card--texture, material, layout.  

In fact, I like this idea so much that I have one more one color card--and my second YouTube video to help illustrate a background technique I use in the card.  Perhaps you'll drop by again tomorrow for this Part 2 blog post of my monochromatic obsession.

I hope you like these cards--and that you'll visit these two challenge blogs for some more inspiration from my very talented co-designers and also to join the challenges.

Thanks for stopping by,

Essie  


Saturday, May 1, 2021

Crafting on the Edge: A Die Cut Booklover's Delight

 Hello friends, my card today helps kick off the May challenge for A Blog Named Hero, "shaped cards."  And before I forget, if you play along at our blog's website by posting your own shaped card, you'll be eligible for a very handsome prize from our blog sponsor, Hero Arts


This is a nearly effortless shaped card, using watercolors and showcasing one of my favorite pastimes, reading.  Hero Arts recently launched an entire stamp and die line all about books and reading--and it could be that I went a little crazy in ensuring I added nearly all of them to my stash!  

Here's how I made this one layer card with the bookish border:

1.  Partially die cut the stacked books fancy die from a piece of water color paper (I like Fabriano Artistico, but any good watercolor paper will work), creating an A2 sized card (the 4.25' width includes the shaped right edge of the card)

2.   Leaving the die in place on the watercolor paper, I changed my die cutting sandwich to a set up for die embossing a die and ran the paper through again, this time embossing the book stack image into the paper.  

3.  Water colored the panel--because the book stack is embossed into the paper, it's really easy to get the color to stay exactly where I wanted it.  And that straight line between the yellow wall and the gray-brown table stayed straight and separate by using a piece of painter's tape to keep the darker color nice and straight.

4.  Used a gold pen to go over every embossed line in the book stack --this not only adds some extra interest and shine, it also gives the card a finish look.

5.  Stamped the sentiment, which is one of my favorites from the Literary Quotes stamp set--and well, that's that!

I hope you'll show off your shaped card by linking it to A Blog Named Hero--and please use the hashtag #ablognamedhero so that we can all ooh and ahh over your creation! 

Thanks for stopping by!

Essie


Wednesday, February 17, 2021

A Blog Named Hero--Sending Love.


I am so excited to be part of the Design Team for A Blog Named Hero, and today my first DT cards have been posted.  

For this month’s “Anything Goes” challenge, I made a set of four cards that send love. 


You'll find closeups of each card and a some info about how I made each card.  You'll also find my teammates' creations and a place to link your own "Anything Goes" creations (there are prizes!).   

I hope you'll play along--I'd love to see what you make!                                         

Thanks so much for stopping by,

Essie

Friday, February 12, 2021

Abstract Seascape with a gel press and stencil

It's Friday.  Let's daydream a little. 

During these unprecedented, often difficult, times, art takes me away from the worries of the day. While I'm immersed in colors, shapes, and textures, my doubts just recede into the back bits of brain.  

Lydia Fiedler (aka Understand Blue) is a great artist AND a great teacher.  Some of us get together most weekday evening for her Facebook Live "classes" and we chat with her and each other--and it is a saving grace, for me, of the pandemic.  At the Beyond the Blue challenge blog we try out Lydia's techniques, share them, and encourage you to join us with your own creations.

So, our Beyond the Blue Challenge this week is to make a "folded" gel press landscape--and Lydia's short video explains it best.  Do watch it -- and all of us on the BTB Design Team would LOVE you to give it a try.  Please post it on our blog and let us see what you make!

Here's mine: 


I added a favorite swirly Hero Arts stencil to the bottom of my print, and used two yellows and a blue and a blue-green acrylic (Golden Open is the brand I've like best for gel press) for this abstract print.  

Here's what I see:   (and you can see what you want!). This is my imaginary view from aboard a large ship as I lean out over the water, and peer into the hazy, hot horizon, where I see a foreign port coming into view.  I see minarets, or tall masts of sailing ships.  If I close my eyes, I hear the ocean.

I've put this 8X8 framed gel print in our family room--where I can look at it and dream of new adventures.  

I hope you'll try this technique and post your creation on our challenge blog!  It's much easier than it looks--and so much fun!

Thanks for stopping by,

Essie


Sunday, January 24, 2021

Use Those Gel Press Prints!


I struggle a bit with backgrounds (I may have mentioned this previously) but with gel press prints, I have a ready supply of interesting colors, patterns and even depth and shine to use as card backgrounds.  Today, instead of focusing on one of those backgrounds, I've used my gel press prints for die cuts the clean and simple 5X7 inch card you see above.  

Method and Chat:  Using a gel press is easy and relatively inexpensive. The only real equipment you need is a gel press, a brayer, copy paper (yes, the stuff you use in your computer), and some pigment. For the card above, I used Golden Open acrylic paints, but  I've also used dye inks, pigment inks, distress inks, alcohol inks, and watercolor (so there's almost certainly something in your stash that works).  Understand Blue has great gel press videos on You Tube - if you're interested in good tips and techniques and videos, I've linked you to her playlist. 


I've made some pretty successful prints (meaning: just what I wanted!).  Here are three I like:


 I've also had some failures (meaning:  not what I was aiming for....cue sad horn music, mwah, mwaaaah, mwaaaaaaah).

And that's where today's card originates--with this gel press failure:

This print was just NOT pleasing to me--the cake impression is blurry, and the gifts didn't work out at all, but I did like the colors.  I decided to salvage the print because of those happy, saturated colors--they look like a party to me.  

First, I pasted the copy paper print onto a thin piece of card stock (65#, the inexpensive kind) to give me enough body to be able to die cut the page.  Next, I grabbed the (Hero Arts) cake die I used to make the impression you see above and die cut the cake from a colorful part of that same failed print.  

I grabbed a (My Favorite Things) sentiment die, and cut it out twice from a second (similar) failed print, which I'd also (first) pasted to lightweight card stock.  Tip:  The glue needs to be FULLY dry before you die cut...ask me how I know!


Next:  I aligned and die cut the sentiment out of white cardstock, and carefully pieced in (inlaid) the gel press letters.  I put the cake on a wobbler and placed it to the right of the sentiment.  Done.  I get wobblers from Art Impressions. I think they not only elevate the piece cake to give the card some texture/interest, but I really like the whimsy of that cake kind of wobbling about.  


And that's it--I'd love to hear what you think of the card and whether you've entered the gel press craze!  

Thanks so much for stopping by, 
Essie


Friday, January 1, 2021

Hope

Although starting a cardmaking blog as a New Year's resolution is hardly a novel idea, I'm hopeful that it's an idea I can actually make good on in 2021!

As I move into 2021, I'll try to post my cards not only on Instagram (see me there @escards) and Facebook (you can friend me there, I'm Essie Cards), but also here.  When I have some techniques to show you, I may really go out on a limb and make a little youtube video.  Just because it's a good year to try new things, to start over, and to stretch our way into whatever our brave new world will look like.

That overwhelming feeling--of hopefulness--has made its presence known in the cards I've been making in the last week.  I've been playing with cards to send my friends and family in the new year that are all about hope and brighter tomorrows.  Here are three, all using the December 2020 Hero Arts My Monthly Hero Kit*, which is, as ever, unique, beautiful, and timely.  I hope you enjoy them.  


I hope you'll drop by again--it will help to keep me honest, so that I can keep my little New Year's resolution! 

Thanks for visiting!
Essie


*I have not been compensated or sponsored by any company mentioned in this post.  I like to make cards, and am simply happy to share the materials and products I enjoy.  


A Big Bright Celebration with Hero Arts