Monday, January 8, 2024

Elegant Valentines with Hero Arts Digital Designs

 Hello Crafty Friends,

I had a bit of a lightbulb moment recently:  My children are no longer little kids.  My son (20) and daughter (17) still (claim to!) love to get cards from me--but cutesie critters from my stash are no longer great choices for either of them.  Time to change up my card-making for the kids. 

Fortunately,  the Swirl Valentine Digital Kit from Hero Arts is just what I need to create elegant cards for both of them.  

Here's the card for my son:

How to:  Using the burgundy background in the kit, the swirly big heart, and the Love You sentiment, I quickly built a card for my son--I printed the background on our family color printer and then over printed the heart and sentiment over the background using my laser jet printer.  I added silver toner foil to the design, ran it through my Minc foiling machine matted it with silver cardstock, and put it on an A2 card base.  Too. Easy!

Here's my daughter's card:

How to:  I created a background using the Leaf and Floral Stencil and pink inks.  I printed the same image and sentiment I used for my son's card--but this time I printed it onto vellum paper using my laser jet.  I added hot pink toner foil to the vellum, and ran it through my Minc.  I also blended pink inks onto the back of the heart image to help it stand out.  I placed the vellum design on the background and that was it!

Two elegant cards for my nearly adult kids (wow, time flies), ready in plenty of time for Valentine's Day. 

My post is part of the February Hero Arts blog hop -- and if you leave comments here and on other stops along the hop, you could win $50 gift card, drawn from the comments left across the hop. Enter by Sunday, January 14th at 11:59pm PT, and the winner will be announced on the Hero Arts blog the following week.

Here's the entire hop list:

Thanks for stopping by!

Essie

Monday, December 4, 2023

Lucky Number Seven - with Hero Arts Digitals

 Hi Friends,

Welcome to the December My Monthly Hero (MMH) blog hop!  There's so much inspiration for you--I hope you're hopping all the way through.

My crafty friend Deborah is the kind of grandmother I hope I'll be someday--active, fun, crafty, and completely devoted to her grandson, who is about to be seven.  Today's card is inspired by her  grandson, who turns seven next month.  

Hero Arts has three fun and affordable digital kits to kick off the New Year--and this Whimsical Numbers Digital Kit, has numbers in a very cute script, that looked perfect for the occasion!

How To:  

1. This is a simple gatefold card, using a bright green cardstock base that is 5.5 X 8.25 inches, scored and folded on both sides, 2.25 from each end.  I've added a white panel to the inside, and it is the usual 4 X 5.25 inches.  

2. Setting aside the card base, I used the word seven image from the Whimsical Numbers kit to make a quick background by copying that "seven" word multiple times into a blank Google slide, and moving the images around to create a strip of sevens that marched in a line, two horizontal sevens intersected with a vertical seven.  I repeated it several times to ensure that the strip was longer than 4 inches --so it would be long enough to cover the A2 background I wanted.  I grouped this strip of sevens, and copied the grouping several times, arranging them one below the other on the slide.

3. In Google slides under tools recolor, I found both a bright green and teal recolor option, so I chose those two colors, creating a green and teal color scheme.  

4. After printing the slide onto lightweight cardstock (but you could also use plain old copy paper for this technique,) I cut two panels that fit just inside the "gates" of the gatefold:  2 X 5.25 inches--and mounted them on the gates.  

5.  I also took the word seven, blew it up, and did a shadow technique on a separate google slide, again using teal and bright green recoloring.  After printing this out, I die cut the shadowed word on the smallest of three larger stars from Hero Arts 5-Point Stars Infinity die set.   Using the green card base color and a teal that matched the background, I die cut two progressively bigger stars, and a few smaller stars in both colors.  

6.  The rest is kind of obvious:  Mount the 3 big stars on top of each other, and then glue down the left half (ONLY!) of the star onto the left "gate."  Add the random smaller stars in a way that pleases your eye and that's it.  Minimal supplies for a maximally happy birthday card for a very well-loved young man!

I'd love to see your results with this month's new Hero products--digital and physical--there's so much new fun on its way!

Here's the full blog hop list so that you can see everyone else's creations:


Hero Arts

As always, thanks so much for stopping by!

Essie


Sunday, November 5, 2023

Digital Merriment with Hero Arts

 Hello friends!

    This month Hero Arts has FOUR (yes, 4!!) new digital kits/printables to release with the November My Monthly Hero card kit and add ons--and I've kind of just "gone to town" with these and have made some gift tags, a card that features the too cute digital papers, and a whole lot of foiling with the printable owls and some backgrounds I created with the kits and foiled myself.  Instead of a lot of instruction, let me just "show the goods."  

    First up, using the adorable Christmas Icons Digital Papers and the teddy bear from the Vintage Toys Fancy Dies, I made this simple, graphic card.  

Next up:  Gift tags!  Here, I used the Festive borders and the Frosty Borders kits and made some eassy designs and holiday greetings.  I used the colors Hero provided (often I recolor them using the Google slide app) and printed them onto plain old copy paper.  I glued the paper to holiday colored card stock to  create quick little gift tags, which are always in short supply at my house this time of year!

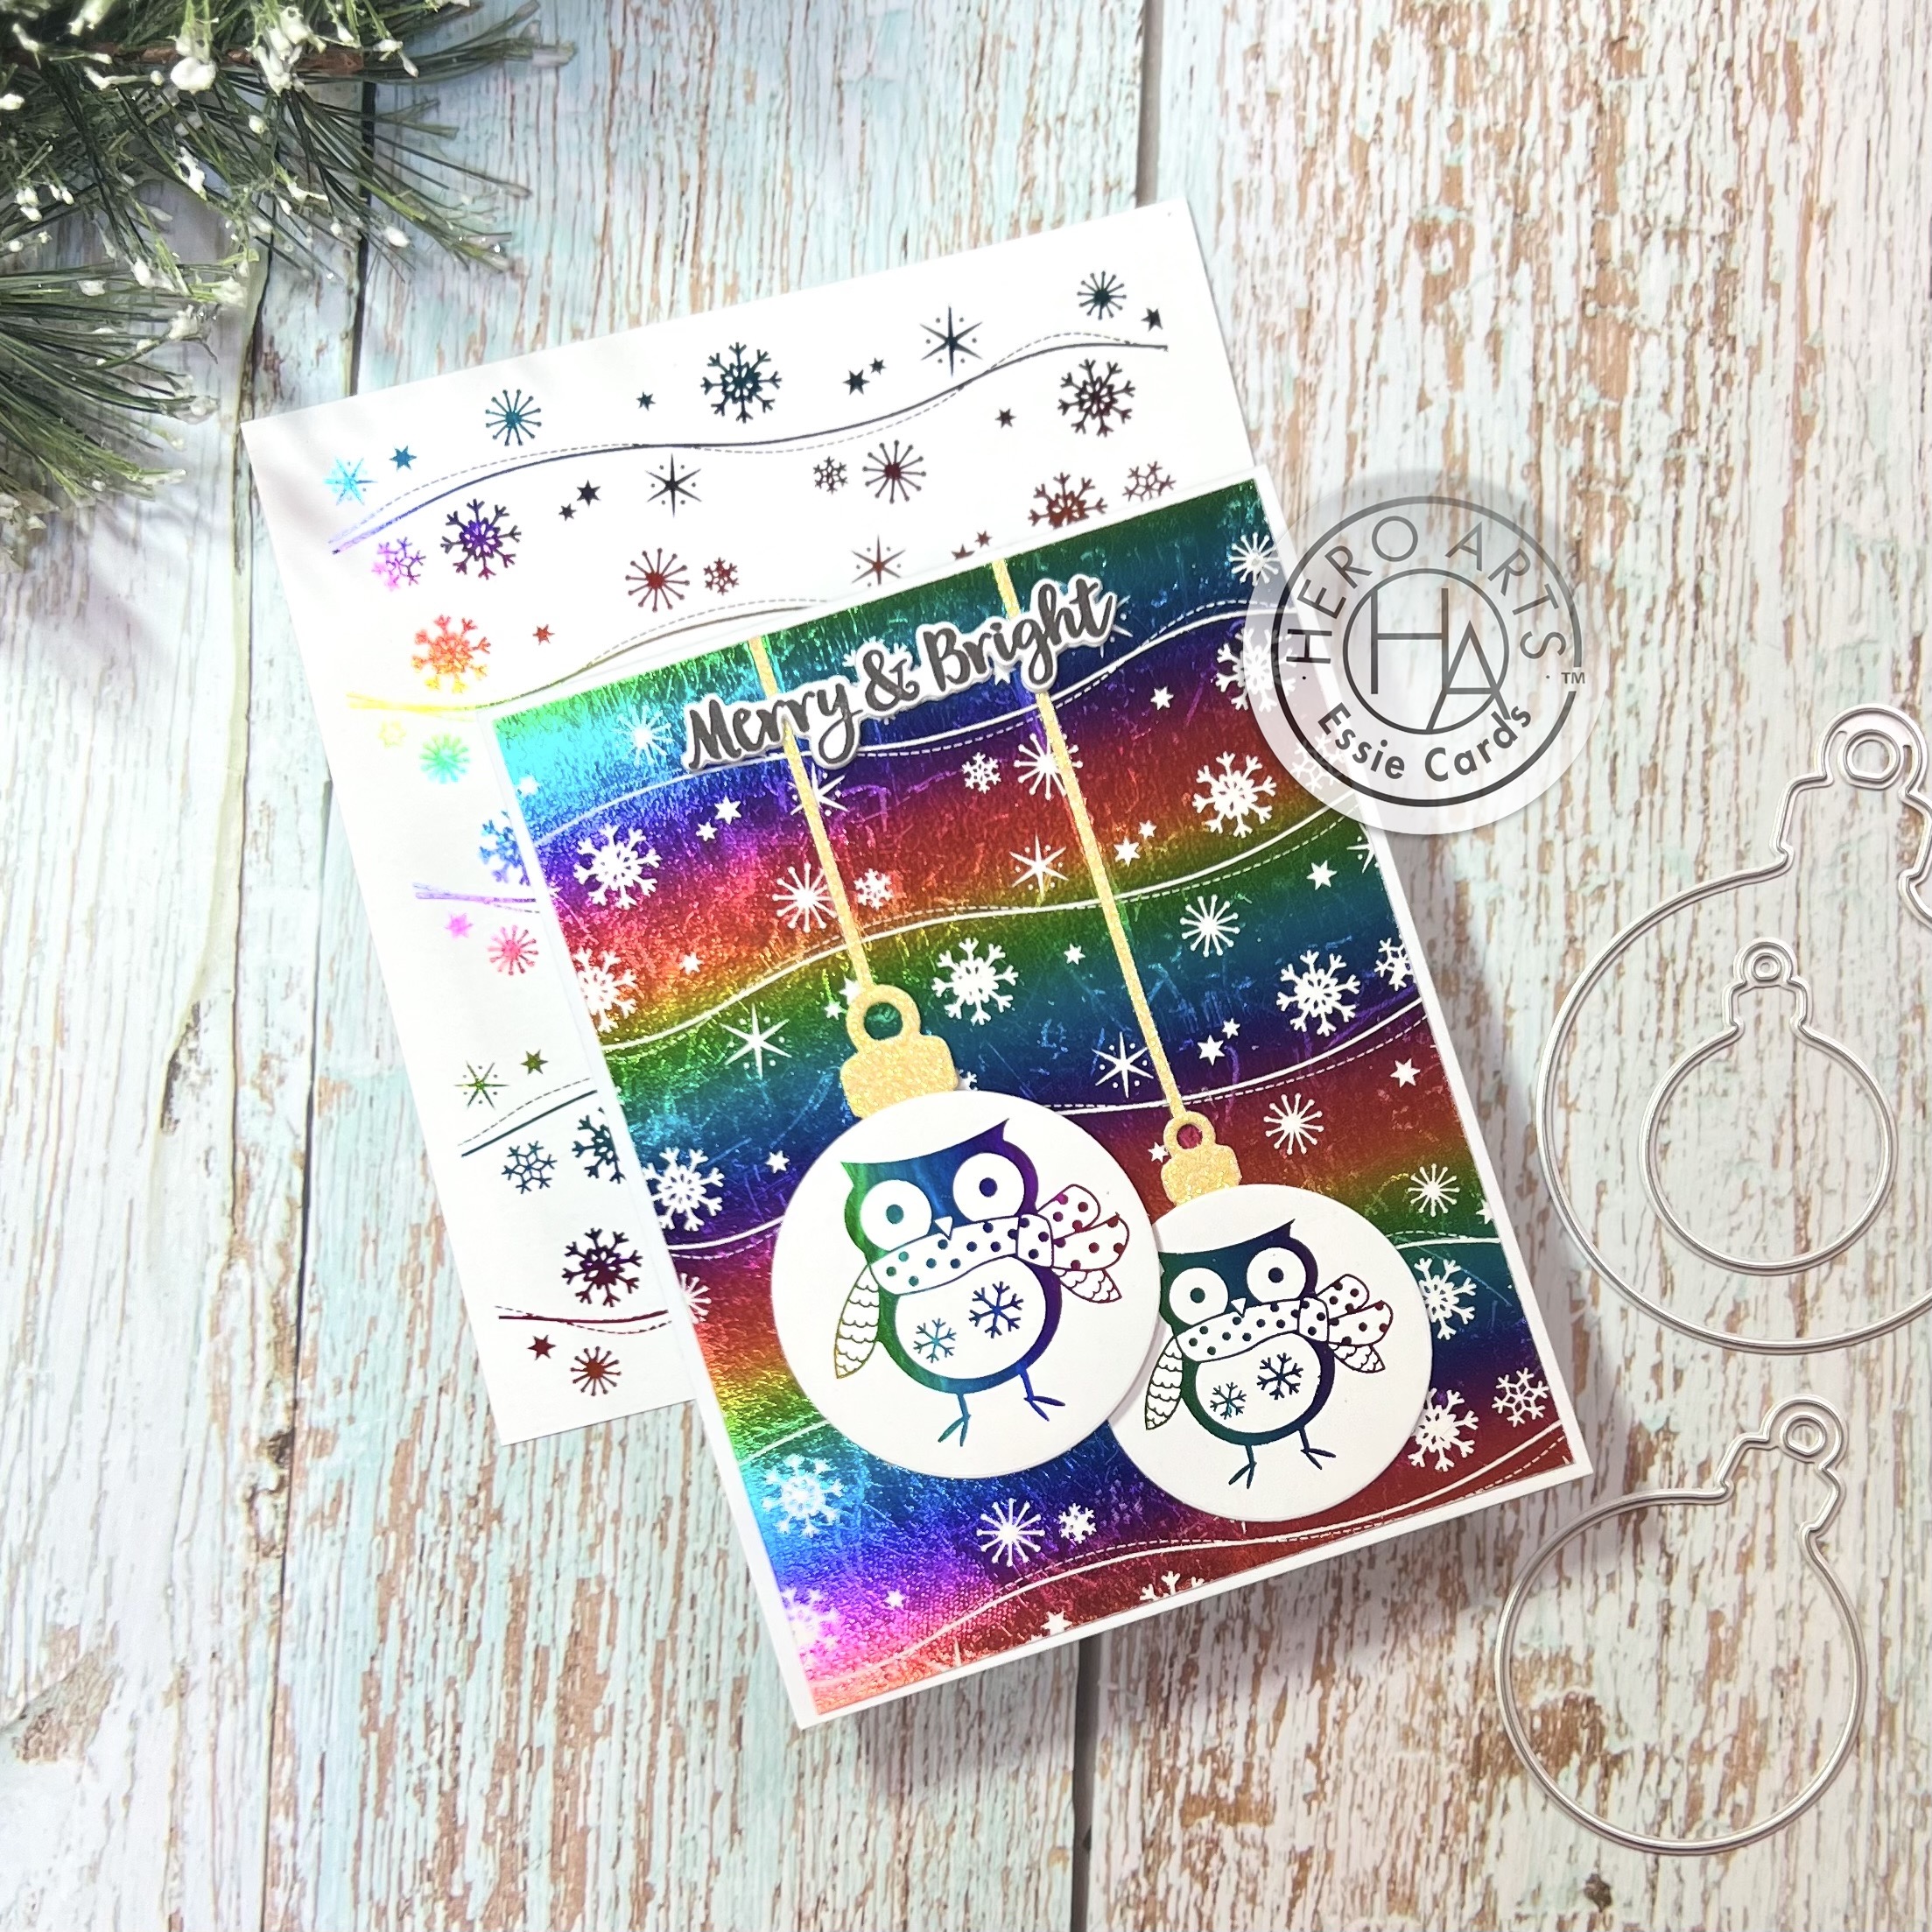
    And finally:  Foiling!  I used the kits again to make two different snowy backgrounds and printed them on my laser printer in black (toner) ink.  You know that this lets me foil these designs with my Minc machine (or you can use a laminator) using toner reactive foil.  I made a couple of handfuls of designs using those snowy backgrounds and also foiling the Owl Tag Printables--so now I have a ton of sparkly owls and tags that will be perfect for holiday packages.  I used the negative foil piece from one of my snowy backgrounds and two little owls to put together a super quick --and super shiny!-- rainbow Christmas cards with two rainbow-foiled owls taking center stage as holiday ornaments.  My daughter says it's "too wild" for her. . . which is fine, I have plenty of wild & crafty friends who I think will love this one.  

    And that's it--plenty of fun with these four new digital products from Hero Arts--I'd love to see what you make with them!

Thanks for stopping by!

Essie

Tuesday, October 17, 2023

Penguin Pals from Gina K. and Thermoweb

 Hello friends,

I was so thrilled to win an early copy of the new Gina K./Thermoweb collaboration - The Penguin Pal Card Kit, and a huge bundle of Gina K. and Thermoweb foils. flock, glitter gel, and huge assortment of adhesives!  Thanks so much Thermoweb and Gina K!  If you follow me on IG or here on my blog, you might know that I am a foiling junkie!  (and you know I have my name on the list for Gina's new Fuse Foiling System.  

My box of goodies showed up yesterday afternoon, just in time for me to make a card and two tags using all the foil-y, flock-y goodness I could, some of the kit's stamps, the sweet penguin die, and the cool snowflake and starburst die.  Here's my card: 

And then, even though it was way past my bedtime, I made a couple of quick tags--because I really wanted to try out the light pink and blue flocking (see that pink penguin!) and the kit stencil, which I paired with the gold glitter glitz gel I received and the Christmas tree die.
And in case you're curious:  Two photos that show everything that came as my prize with the Penguin kit: 
These foils and Glitz gels are soooooo sparkly!  And LOOK at all these adhesives, and flock and the toner card fronts (which I totally hoard!)

So, Christmas has really come early for me!  Thanks again, Thermoweb and Gina K.--you've kicked my holiday making into sparkling high gear!

Thanks for stopping by,
Essie


Monday, October 2, 2023

Winter Homes - Digital pop up card with Hero Arts

 Hi friends,  

There are so many new digital images this month at Hero Arts, it was hard to decide what to focus on.  I've used the sweet houses as the focal point for today's card. 


The base of this semicircle pop-up card uses the Snowflake Digital Papers in light blue--a perfect scene setter for this homes and pine trees in the Winter Homes Printable.  I printed that page on lightweight cardstock and colored the homes and trees with Copic marker in a graphic cartoon-y style.  Very simple. 

Using Hero Arts white glitter cardstock, I cut two 4 3/4 strips, with 1/4 folds on each end.  I used extra strong adhesive on those folds and slotted them into the  1 1/4 inch "wings" of that 6 1/2 inch semi-circle. Those glittery strips make snowy hills on which I adhered the two homes and pine trees.  Again--the key here is using extra strong adhesive--to me, that's the key to success when working with glitter cardstock.

For a sentiment, I've used a rub-on transfer from the new Holiday Messages set.  I think the no-frills font really works well with this little scene.

And that's the card!  

I hope you'll give these digital images a try -- and I'd love to see what you make!

Thanks for dropping by!

Essie

Monday, September 4, 2023

Mushroom Hunting with Hero Arts

Hello Crafty Friends,

How about some fantasy mushroom hunting using the latest printable from Hero Arts -- are they not adorable?  Kind of Autumnal Alice in Wonderland goes wild, I think?

I drank my morning coffee while watching the AMAZING Kelly Taylor do some bokeh/Copic backgrounds--her video was so inspiring that I had to try it myself! 

I spent today recovering from jet lag and coloring the grouped mushrooms in this digital printable (while binge-watching Better Call Saul...how have I missed this show?).  My back ground did NOT come out smooth and dreamy (sigh...it is not like Kelly's...), but the streaky colors still made me smile and I carried on coloring my little mushroom patch.  

Following Kelly's lead, I used Hero Arts unicorn white pigment ink with the Large Sprinkled Dots stencil to add that bokeh effect (Kelly does that a little differently, but I think this stencil really gets the job done).  I added a sentiment from the printable that's appropriately punny, backed both the mushrooms and the sentiment in HA's woodland cardstock, mounted them on an A2 card base and BOOM!  presto-card-o, ready to mail.  

I'll have more digital-based cards later this month for you (there's also a tree printable and a leafy digital kit to play with).  Until then, enjoy the changing season and thanks for stopping by. 

Essie

Sunday, August 6, 2023

New Adventures with Hero Arts Digitals

 Hello Crafty Friends!  

My son's return to college is on my mind (we'll be road-tripping to Ohio soon in my minivan to help him move into his very first apartment), so I've made a couple of cards that nod to his future in a positive way. 

These cards are two-fer, because they use a single design and a single sheet of foil to create two different card fronts--one using the positive design, and the other using the "waste material" or negative space  that the design left behind on my piece of toner foil.  

Note:  To foil digital designs you need:  a laser printer, a laminator or Minc machine, toner foil, and, for the black background card, either specialty toner paper, or very glossy black card stock.  

Here's my how-to for the design and the white background card:  Using the minivan image I discovered among the over 20 images in the Roadtrip Adventure Digital Kit, I created a line of minivans and copied that line o' vans again and again, until it covered a space about the size of an A2 card front on a Google slide in a design that was pleasing to my eye.  

Another note:  I've never taken a design class, and never had a lesson in Google docs/slides or anything else, this is just me playing around until I have something that looks right.  Google slide software is free, which is what I love most about it. 

I printed that slide/page on my Laser Jet printer onto lightweight card stock (yes, the cheap stuff I do NOT use for card bases), added summer-y rainbow toner foil, and ran it through my Minc machine/laminator.  After cutting the Google page to an A2 size, I cut a star shape  from the upper right corner of the foiled background using the 5-point infinity star dies and cut another star, one size larger, from Hero Arts pitch black card stock.  I also cut out 5 of the smallest-sized star from the pitch black card stock.  Using foam tape, I added the black star over the star cut out, and then adhered the smaller star cutout on top of the black star, making sure to align the smaller star's minivans with the background.  I like this semi-eclipse design--it's slightly subtle, but adds texture and interest.  I adhered the panel to an A2 card base, again made from pitch black card stock, scattered around the 5 smaller stars and added a sentiment I like from the Encouragement Sentiment Strip set which I'd pre-cut using the Sentiment Strip Fancy Die -- I love having these sentiments ready to go. 


To make the second card--the one with a black background, I used the leftover/negative space toner foil.  I've found that shiny black card stock, or specialty black toner card stock take toner foil perfectly.  


I just placed the minivan "leftover" foil piece over an A2 piece of glossy black card stock.  I made a quick video of the reveal as I remove the foil backer from the card, just click the arrow below. 

 
For the sentiment tag, I used the Travel Tag & Notes Printable--I printed the tags in black onto black card stock, cut out the tag I wanted (you can see the ink on the card stock--if you're looking for it!--and ran it through my Minc machine/laminator with gold toner foil.   Eureka!  The tag came to life in gold on black.  I gold heat-embossed a sentiment from the Seaside Highway HeroScape onto the tag and added a gold bow to complete the tag.  I mounted the panel onto a white A2 card base, and used foam tape to pop up the black tag.  

(Final Note:  Hubby says both cards are  "somber."  I say they are modern and urban cool and good masculine cards for my son.  We have agreed to disagree.)

Thanks so much for stopping by--I love that you took the time to drop in (and your comments always make my day!

Essie


A Big Bright Celebration with Hero Arts